How to assemble and disassemble a portable pool without damaging it
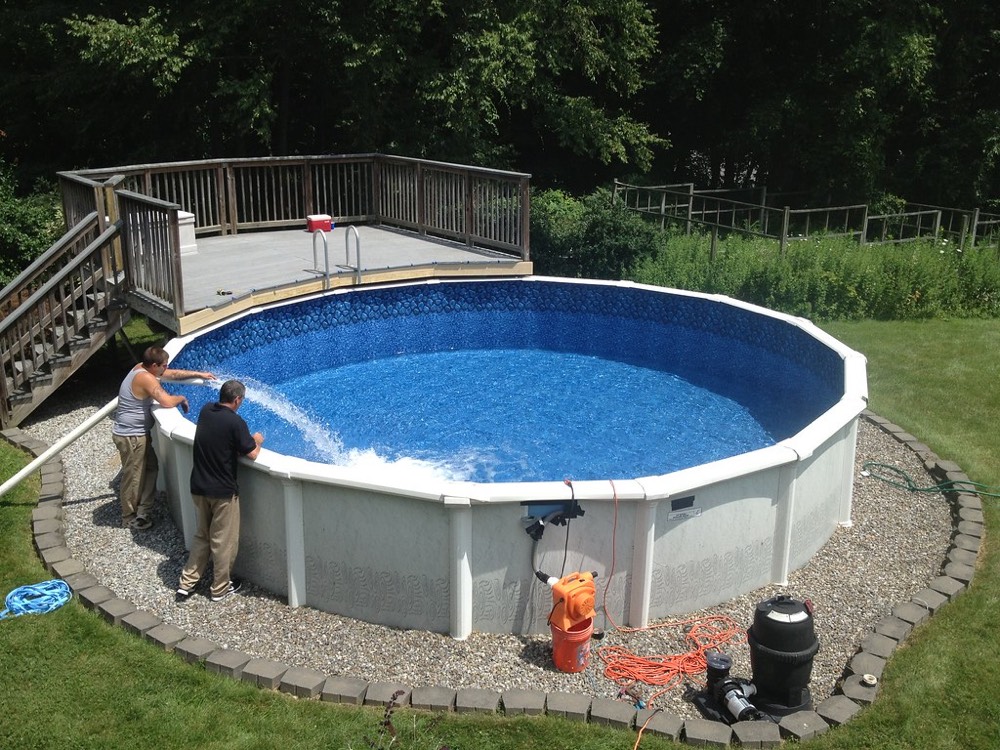
Preparation Before Assembling or Disassembling a Portable Pool
Before you start the process of setting up or taking down a portable pool, it's crucial to do some proper preparation to avoid any damage and ensure your safety throughout the job. The first step is to inspect the overall condition of the pool, making sure there are no visible damages to the structure, walls, or joints. It's a good idea to check the pool at least a week before installation or disassembly, as this gives you time to spot any potential issues that might come up during the process. For example, if you notice any wear on the wall joints, it's better to replace them before you start. Also, it's important to make sure the area where you're going to set up the pool is level and free of obstacles. An uneven surface can cause the pool to tilt or get damaged during the setup process.
To ensure a level ground, you should use a bubble level and adjust the terrain with sand or gravel if needed. In some cases, you might even use a concrete foundation system for added stability, especially if the pool is large or if you plan to use it during the winter months. Another key aspect is having all the necessary tools and materials on hand. You'll need a cross wrench, a screwdriver, a level, a measuring tape, and if the pool has metal components, a degreaser spray. It's also helpful to have a rope for securing parts during assembly or disassembly. These items are essential to ensure the process is done safely and efficiently, avoiding damage to the pool or the surrounding area.
Finally, it's a good idea to plan the time needed for the setup or disassembly. On average, setting up a medium-sized portable pool can take between 4 to 6 hours, depending on the complexity of the model and the experience of the installer. If you're doing it without prior experience, it's better to have a helper or even hire a professional. This not only saves time but also reduces the risk of damaging the pool.
Step-by-Step Guide to Assembling a Portable Pool
Assembling a portable pool requires attention to detail and a precise sequence to ensure the structure is stable and safe. The first step is to place the base or supports of the pool on the level ground. These supports usually have a depth of between 20 and 30 centimeters, which helps stabilize the pool. It's important to make sure the supports are placed in a straight line and at the same height, using the level to check their alignment. Once the supports are in place, you move on to placing the pool walls. These typically come in sections that are designed to fit together.
Before you start putting the walls together, it's a good idea to lay out all the pieces on the ground to get a clear idea of how they fit together. This helps avoid confusion and ensures that you're using the right pieces in the right order. Once you're ready, start by attaching the first wall to the support. Make sure the connections are secure and the wall is properly aligned. Continue this process for each wall, making sure to check that everything is level and stable as you go. It's also a good idea to use the measuring tape to double-check the distances between the walls to ensure they're even.
Once all the walls are in place, it's time to install the floor. The floor is usually a flexible material that's designed to fit snugly inside the walls. Carefully place the floor inside the pool, making sure it's centered and level. If the floor has any pre-drilled holes for the drain or filter, make sure those are aligned with the corresponding parts of the walls. Once the floor is in place, it's time to install the filter and drain system. These components are essential for keeping the water clean and circulating properly. Make sure they're connected securely and that there are no leaks or gaps.
After the filter and drain are in place, it's time to add the water. Start by filling the pool with water slowly, making sure not to overfill it at once. This helps prevent any sudden pressure that could cause the walls to shift or crack. As the water level rises, keep an eye on the walls to make sure they're staying in place and that there are no signs of stress or damage. Once the pool is filled to the desired level, it's time to add the necessary chemicals to keep the water clean and safe for swimming. Follow the manufacturer's instructions for the correct dosage and mixing procedures to ensure the water is properly balanced.
Step-by-Step Guide to Disassembling a Portable Pool
Disassembling a portable pool is just as important as setting it up, and it requires careful planning to avoid any damage. The first step is to drain the pool completely. This can be done by opening the drain valve and allowing the water to flow out. Make sure to use a bucket or a siphon to remove any remaining water, as leaving water in the pool can cause damage to the walls and floor. Once the pool is dry, it's time to remove the filter and drain system. These components are usually attached with bolts or clips, so use the appropriate tools to loosen and remove them without causing any damage.
Next, you'll need to remove the floor. If the floor is attached with clips or Velcro, gently lift it out and set it aside. If it's secured with screws, use a screwdriver to carefully remove them. Once the floor is out, you can start removing the walls. Begin by loosening the connections between the walls and the supports. If the walls are attached with bolts, use a wrench to remove them. If they're connected with clips or Velcro, gently pull them apart. As you remove each wall, make sure to keep track of the pieces to avoid losing any parts during the process.
Once all the walls are removed, it's time to take down the supports. If the supports are screwed into the ground, use a screwdriver to remove them. If they're simply placed on the ground, you can lift them up and move them aside. As you disassemble the pool, it's important to keep everything organized so you can easily put it back together later. Place each piece in a designated spot or use labeled containers to keep track of everything. This helps prevent confusion and ensures that you don't miss any parts during the process.
After all the components are removed, it's a good idea to clean the pool and its parts thoroughly. Use a mild detergent and water to wipe down the walls and floor, removing any dirt or residue. This helps prevent any buildup that could damage the materials over time. Once everything is clean and dry, you can store the pool in a safe, dry place until the next use. Proper storage is essential to maintain the integrity of the pool and ensure it's ready for use when needed.
Additional Tips for Maintaining and Storing a Portable Pool
Once your portable pool is assembled and in use, it's important to maintain it properly to ensure it lasts for many seasons. One of the most important things you can do is to clean the pool regularly. This includes removing any debris, such as leaves or insects, that might end up in the water. You can use a skimmer net or a pool vacuum to keep the water clear and free of contaminants. Regular cleaning not only keeps the water clean but also helps prevent the growth of algae and bacteria, which can be harmful to swimmers.
Another key aspect of maintenance is checking the water chemistry regularly. The pH level and chlorine concentration should be within the recommended range to ensure the water is safe and balanced. Use a test kit to check these levels and add the appropriate chemicals as needed. It's also important to keep an eye on the filter and drain system, making sure they're functioning properly and free of clogs. A clogged filter can reduce water circulation and lead to poor water quality.
When it's time to store the pool for the off-season, it's important to do it correctly to prevent damage. Start by draining the pool completely and cleaning it thoroughly. Once it's dry, remove all the components and store them in a cool, dry place. If you're storing the pool for an extended period, it's a good idea to cover it with a tarp or a storage cover to protect it from dust and UV exposure. This helps prevent any damage from moisture or sunlight, which can degrade the materials over time.
Before storing the pool, make sure all the parts are properly organized and labeled so you can easily put everything back together when you're ready to use it again. This includes the walls, floor, filter, and drain system. If you're storing the pool for a long time, consider using a storage container or a designated storage area to keep everything safe and secure. Proper storage not only protects the pool but also ensures it's in good condition when you're ready to use it again.
Pro Tips for Assembling and Disassembling a Portable Pool
- Always inspect the pool before starting the assembly or disassembly process to catch any potential issues early.
- Use a bubble level to ensure the ground is level and the supports are aligned properly.
- Have all your tools and materials ready before you start to avoid delays and ensure a smooth process.
- Take your time and double-check each step to prevent mistakes that could lead to damage.
- When disassembling, keep track of all the parts and organize them so you can easily put everything back together.
- Store the pool in a dry, cool place to protect it from the elements and extend its lifespan.
Tips for Assembling and Disassembling a Portable Pool
- Use a spirit level to ensure the ground is perfectly flat before placing the pool, especially on uneven surfaces like grass or dirt.
- When filling the pool, do it gradually to avoid sudden pressure on the walls, which can cause stretching or tearing.
- After use, always drain the pool completely and allow the liner to air dry for at least 24 hours before storing it.
- Store the liner in a cool, dry place away from direct sunlight to prevent UV damage and prolong its lifespan.
- Before reusing the pool, inspect the liner for any signs of wear, such as cracks, holes, or thinning, and replace it if necessary.