Fiberglass pool installation: full process and real-time timelines
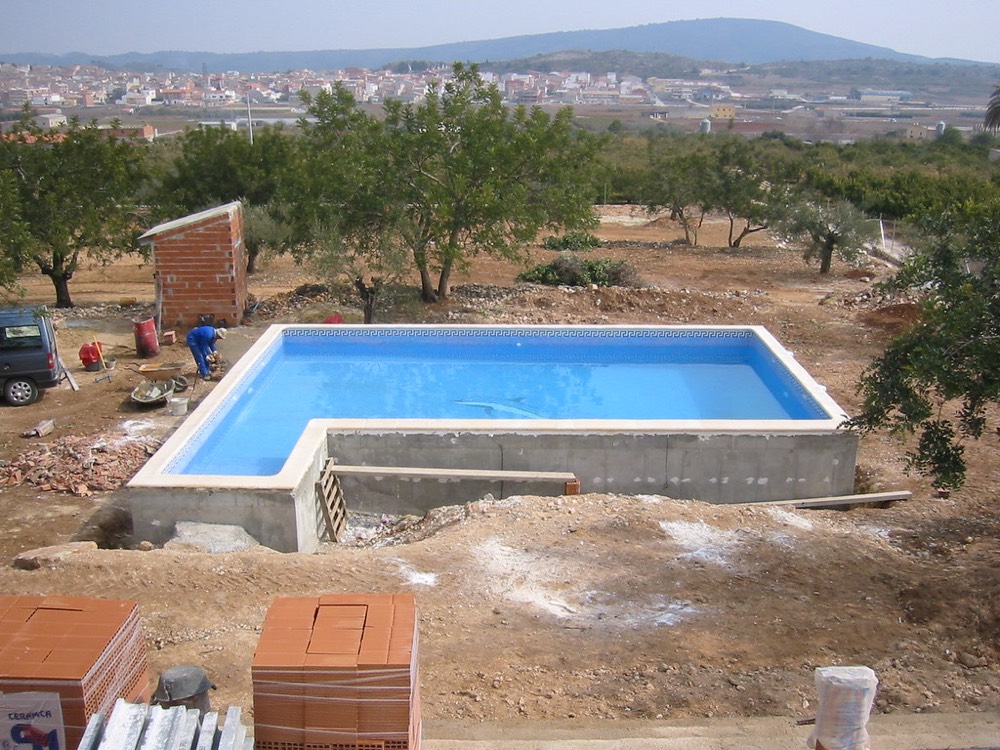
Preparing the Site: Laying the Foundation for a Fiberglass Pool
Before you even start thinking about installing a fiberglass pool, you need to make sure the site is prepared properly. This is the first and most crucial step in the process, because the foundation you lay now will directly impact the stability, longevity, and overall performance of your pool. A solid base is essential to support the weight of the pool and the water it holds, and it also helps prevent future settling or shifting.
The ground should be flat, stable, and strong enough to bear the load. A common recommendation is to use a compacted mix of sand and gravel as the base, with a minimum depth of 15 cm. This layer acts as a stable foundation for the pool's structure and helps prevent any sinkage or movement over time. The preparation process usually takes between 3 to 5 days, depending on the size of the area and the condition of the soil. In areas with clay or wet soil, you might need extra time to ensure the ground is properly stabilized.
For example, if you're installing a pool that's 10 meters in diameter, you'll need to dig a trench that's 30 cm deep and then fill it with alternating layers of gravel and sand. Each layer should be compacted to ensure a firm, level base. Once the base is ready, a plastic membrane or a polyethylene mat is placed over it to prevent the sand from mixing with the surrounding soil. This membrane should cover the entire surface and be at least 10 cm high to protect the structure.
Finally, the concrete base is poured over the membrane. This base is built on top of the membrane and needs to cure for at least 7 days before the pool is placed. The concrete base is critical because it provides a stable and level surface for the pool to sit on, ensuring proper alignment and preventing any structural issues down the line.
Building the Support Structure: Concrete Base and Footing
The concrete base is one of the most important components in the installation of a fiberglass pool. It serves as the foundation that supports the entire structure and ensures the pool remains level and stable over time. The base should be flat, strong, and have a slight slope to allow for proper drainage. The depth of the base varies depending on the size of the pool, but it's typically between 15 and 30 cm.
For a pool that's 8 meters in diameter, the concrete base should be at least 1.5 meters wide and 15 cm high. The process of building the concrete base involves two main steps: first, the plastic membrane is laid over the sand and gravel base, and then the concrete is poured on top. It's important that the concrete is mixed properly and allowed to cure for at least 7 days before the pool is placed. In some cases, reinforced concrete with fiber additives may be used to increase strength and durability.
Alongside the concrete base, a perimeter footing is also necessary to support the pool's structure. This footing is built using reinforced concrete and should be at least 30 cm deep. In areas with weak or unstable soil, it's recommended to use pilings or deep footings to ensure the pool remains stable. The footing should be resistant to water and corrosion, which is achieved by using high-strength concrete and metal reinforcement.
Proper installation of the concrete base and footing is crucial to the long-term success of your fiberglass pool. A poorly constructed base can lead to uneven settling, structural damage, and even water leakage. Taking the time to get this step right will save you from costly repairs and headaches down the road.
Placing the Pool: Installation and Alignment
Once the base is fully cured and the footing is in place, it's time to install the fiberglass pool. This step requires careful planning and execution to ensure the pool is level, properly aligned, and securely positioned. The pool itself is a large, heavy structure, and any misalignment or improper placement can lead to long-term issues like uneven water levels or structural stress.
Before placing the pool, it's important to double-check that the base is completely dry and that the surface is perfectly level. A laser level or a string line can be used to ensure the base is flat. The pool is typically lifted into position using a crane or a forklift, and it's placed on top of the concrete base. It's important to align the pool with the surrounding landscape and any existing structures to ensure it looks balanced and functional.
Once the pool is in place, the next step is to secure it to the base. This is usually done using anchor bolts or brackets that are embedded in the concrete. These anchors help prevent the pool from shifting or moving due to water pressure or external forces. It's also important to ensure that the pool is positioned so that the water can drain properly and that there's no pooling around the base.
Proper installation and alignment are critical to the performance and longevity of your fiberglass pool. A well-placed pool not only looks great but also functions efficiently, providing a safe and enjoyable swimming environment for years to come.
Connecting the Plumbing and Electrical Systems
After the pool is placed and secured, the next step is to connect the plumbing and electrical systems. This is a crucial part of the installation process, as these systems are responsible for the pool's functionality, safety, and comfort. The plumbing system includes the filtration, circulation, and heating components, while the electrical system includes the pump, heater, and control panel.
Before connecting the plumbing, it's important to ensure that all the necessary components are in place, including the filter, pump, and heater. The plumbing lines should be routed through the base of the pool and connected to the main equipment. It's important to follow the manufacturer's instructions for installation and to ensure that all connections are watertight to prevent leaks.
The electrical system should be installed by a licensed electrician to ensure safety and compliance with local codes. The main electrical panel should be connected to the pool's control system, and all wiring should be properly insulated and protected from moisture. It's also important to install a GFCI (Ground Fault Circuit Interrupter) to protect against electrical shocks and ensure the safety of users.
Once the plumbing and electrical systems are connected, the pool should be tested for leaks and functionality. This includes checking the water flow, ensuring the pump and heater are working correctly, and verifying that all electrical components are operating safely. Any issues or leaks should be addressed immediately to prevent damage and ensure the pool is ready for use.
Final Touches and Testing the Pool
Once the plumbing and electrical systems are in place and functioning correctly, the final step is to complete the installation and prepare the pool for use. This includes filling the pool with water, testing all systems, and making any necessary adjustments. It's important to ensure that the water is clean and clear, and that the filtration and circulation systems are operating efficiently.
Before filling the pool, it's recommended to check the water level and ensure that the pool is properly balanced. The water should be filled gradually to allow any air pockets to escape and to prevent damage to the pool structure. Once the pool is filled, the filtration system should be turned on, and the water should be circulated for at least 24 hours to ensure proper chemical balance and clarity.
After the pool is filled and the systems are running, it's time to test the electrical components, including the pump, heater, and control panel. All systems should be checked for proper operation, and any issues should be addressed before the pool is used. It's also important to install the necessary safety equipment, such as a fence or cover, to ensure the pool is safe for use.
Finally, the pool should be left to settle for a few days to allow the structure to stabilize and for the water to reach its optimal clarity. During this time, it's important to monitor the water level and make any necessary adjustments. Once everything is in place and functioning correctly, your fiberglass pool is ready to be enjoyed for years to come.
Pro Tips for a Successful Fiberglass Pool Installation
- Always ensure the site is properly prepared with a stable, level base before starting the installation process.
- Use a laser level or string line to check the base for flatness and alignment before placing the pool.
- Follow the manufacturer's instructions for installing the plumbing and electrical systems to ensure safety and efficiency.
- Have a licensed electrician install the electrical components to ensure compliance with local codes and safety standards.
- Test all systems, including the filtration, circulation, and heating, before filling the pool with water.
- Allow the pool to settle for a few days after installation to ensure proper stabilization and water clarity.