How to hatch eggs at home: a practical guide to get your first chicks
Starting right: fertile eggs and sourcing
The most fundamental requirement for home incubation is also the one most beginners overlook: the eggs must be fertile. Fertility requires a rooster to have mated with the hens within the last seven to ten days. Supermarket eggs are unfertilised and will never develop regardless of how well you manage the incubation conditions. You need to source fertile eggs from a farm or breeder where hens live with an active rooster, and ideally from a source where the breeder can tell you when the eggs were laid and confirm that they have been stored correctly.
Freshness matters significantly for hatching success. Eggs to be incubated should be no more than seven to ten days old from the date of laying, stored large end up in a cool room at approximately 15°C, and turned slightly twice daily during storage to prevent the yolk from adhering to the shell membrane. Eggs that are too old, stored in a refrigerator, or left at room temperature for extended periods show dramatically reduced hatch rates. If you are sourcing hatching eggs by post, understand that they may need 24 hours to settle with the air cell before being placed in the incubator. A hatch rate of 60–80% from well-managed fresh fertile eggs is a realistic expectation; rates below 50% usually point to a problem with either egg quality, fertilisation, or incubation management.
Choosing and setting up the incubator
Home incubators range from simple still-air boxes with a manual turning requirement to sophisticated forced-air models with fully automatic turning, digital temperature and humidity displays, and alarms for out-of-range conditions. For a first incubation, a mid-range forced-air model with automatic turning is strongly recommended — it removes the most common error (forgetting to turn the eggs) and provides more consistent temperature distribution than still-air models. Basic forced-air incubators with automatic turning that hold 12–24 eggs are available in Spain for 40–80 euros, which is a modest investment given the learning and experience value of a first hatch.
Set up the incubator at least 24 hours before placing your eggs. Run it empty first to confirm that it holds stable temperature and humidity before any eggs are at risk. Check that the temperature sensor is accurate by comparing it against an independent digital thermometer. Fill the water reservoir channels as directed by the manufacturer to establish the correct humidity level. Position the incubator in a stable indoor location away from windows, heat sources, and areas of frequent foot traffic — temperature fluctuations from sun exposure, open doors, or heating and cooling cycles in the room will destabilise the incubator's ability to hold constant conditions.
Temperature, humidity, and the critical numbers
Chicken embryo development requires very precise conditions. The target temperature is 37.5°C measured at the level of the eggs in a forced-air incubator, with a tolerance of no more than ±0.3°C. At 38°C or above, development accelerates and can cause malformations and early deaths; below 37°C, development slows and hatching may fail entirely. This narrow window means that a reliable, calibrated thermometer is not optional — it is the most important piece of equipment in the process, more important even than the incubator itself. If your incubator displays a temperature that does not match an independent reference thermometer, trust the reference thermometer and adjust the incubator setting accordingly.
Humidity requirements differ by stage. For the first 18 days, maintain relative humidity at 45–55%. This level allows sufficient moisture loss from the egg (the air cell inside the egg must grow to a specific size for the chick to pip and hatch successfully) while preventing excessive desiccation. For the final three days — from day 18 until hatch, a period called "lockdown" — increase humidity to 65–70%. The higher humidity in lockdown prevents the membranes inside the shell from drying and sticking to the chick as it rotates to pip. Chicks that get stuck in the shell during hatch are almost always the result of insufficient humidity during lockdown.
Turning, candling, and monitoring development
Eggs must be turned at least three times per day, and preferably five times, from setting until day 18. Turning prevents the developing embryo from adhering to the shell membrane, which would cause it to die. An easy way to track turning manually is to mark opposite sides of each egg with an X and an O — when you finish a turning session, all eggs should show the same letter facing up, giving you immediate visual confirmation that every egg was turned. Automatic turners eliminate this requirement entirely and are worth the slightly higher cost for beginners who may not be able to commit to turning at the required frequency.
Candling — shining a bright light through the egg in a darkened room — allows you to monitor embryo development without opening the incubator. At day seven, a living embryo shows as a dark spot with visible blood vessels radiating outward like a spider's web; a clear egg with no development is infertile and should be removed to reduce contamination risk. At day fourteen, the embryo fills most of the egg and blood vessels are extensive. By day eighteen when you begin lockdown, stop any further candling and do not open the incubator unless absolutely necessary. The humidity and temperature changes from opening during lockdown can fatally chill chicks in the final stages of development.
Hatch day and brooding the chicks
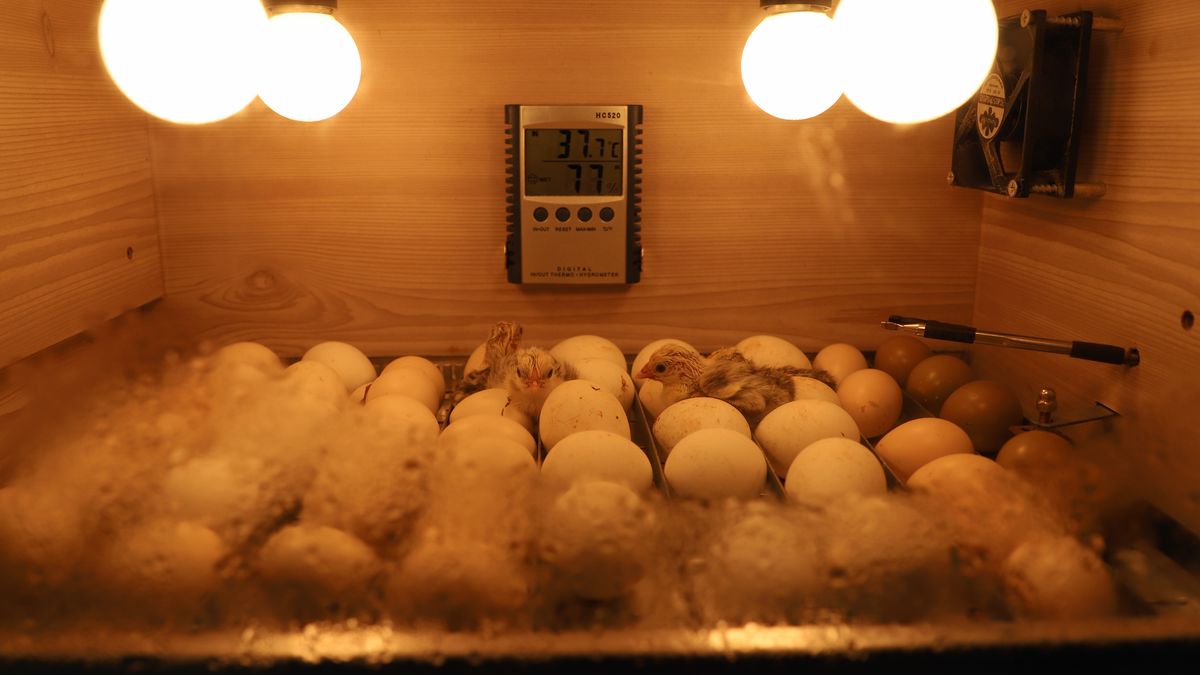
Chicks typically begin to pip (crack the shell) between day 20 and day 21, sometimes as late as day 22 in cooler incubators. Pipping to fully emerging from the shell can take anywhere from a few hours to 24 hours — this is a physically exhausting process for the chick, and the most important rule is not to assist unless a chick has been clearly struggling without progress for more than 24 hours. Premature assistance — pulling a chick from a shell it is not yet ready to leave — almost always causes fatal bleeding from the membranes that are still attached to the chick. Trust the process and resist the urge to intervene.
Leave newly hatched chicks in the incubator for 12–24 hours after they have fully dried and fluffed out. During this period they are absorbing the remaining yolk sac, which provides nutrition and immune factors for the first day of life. Once dry and fluffy, transfer them to a brooder — a warm, secure space with a heat source. The brooder temperature should be 35°C at chick level for the first week, reducing by 3°C each week until the chicks are fully feathered and no longer need supplemental heat, typically around five to six weeks of age. Provide chick starter feed and water from the first day, using a shallow drinker with marbles or pebbles to prevent very young chicks from drowning.
Key tips for successful home incubation
- Calibrate your incubator thermometer against an independent reference before placing any eggs — temperature accuracy is the single most important variable in hatching success.
- Use only eggs that are seven days old or less from laying and have been stored at around 15°C; older or refrigerated eggs hatch poorly even under perfect incubation conditions.
- Do not open the incubator during the final three days of lockdown — the humidity loss from even a brief opening can prevent chicks from pipping successfully.
- Mark eggs with X and O on opposite sides to track manual turning, or invest in an automatic turner to eliminate the most common beginner error entirely.
- Resist the urge to help chicks that are slow to emerge — premature assistance causes far more deaths than waiting does.
- Prepare the brooder and heat source before the expected hatch date so the chicks have a warm, ready space to transfer to immediately after drying in the incubator.